Your source control software must either be VersionRecall from SAPIEN Technologies, or your source control provider must provide an SSAPI-compatible client, such as Microsoft Visual Source Safe.
 Before configuring PrimalScript for source control, you must install your source control software's client.
To configure source control integration
1.Go to File > Options > Source Control > General and make sure that the Universal Version Control feature is disabled (the System menu should be blank or <None>.
2.Select Enable MS SCCSAPI source control, and click OK.
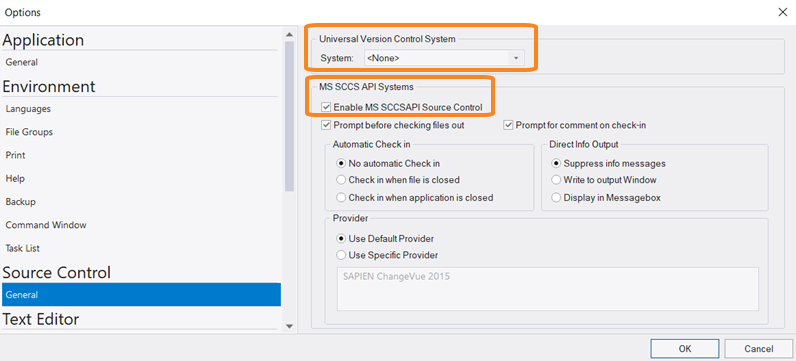
PrimalScript will require a restart, and then it will automatically detect the presence of the source control client and display it in the Provider list box.
 After you enable MS SCCSAPI and restart PrimalScript, your source control provider must be displayed in the Provider list; if it is not, then source control is not properly installed and will not be available to PrimalScript.
To select a source control provider
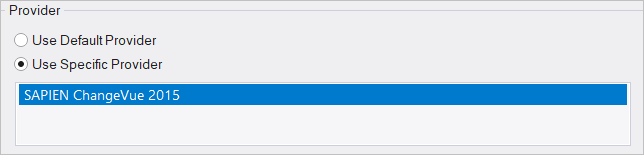
1.Go to File > Options > Source Control > General, then click Use Specific Provider in the Provider section.
2.Select your provider from the list, then click OK and restart PrimalScript.
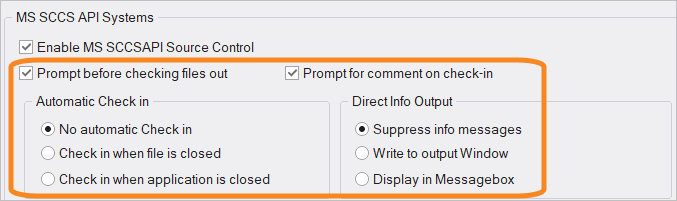
After enabling source control you can configure the options however you like, including prompting before checking out files, and automatic check-in options:
Using Source Control
PrimalScript does not provide source control capability—it simply integrates with the features of your compatible source control software. Some features described here may not be available in your software, or may work somewhat differently.
Before a script can be managed through source control, it must first be added.
You must first save unsaved scripts before they can be added. If you do not, PrimalScript will prompt you to save the file first.
To add a file to source control
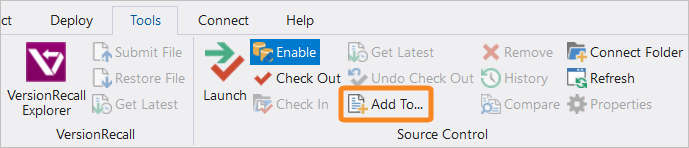
•With the file open, on the Tools tab > in the Source Control section > select Add To...:
Your source control software governs the add process and may prompt you for login credentials, a location for the script, or other information.
Once added, scripts can be checked in or out using the Source Control menu on the Tools tab:
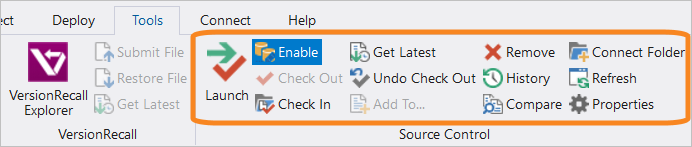
Source Control Commands
Some of these source control options may not be available, or may work differently, depending on your source control provider:
•Launch
Launches your source control software's user interface.
•Enable
Enable / disable source control integration.
•Check Out
Check out the current file from source control.
•Check In
Submit and check in the current file into source control.
•Get Latest
Get the latest version of the current file from source control.
Retrieves a read-only copy of a file.
•Undo Check Out
Reverse a previously performed checkout on the current file.
•Add To...
Add the current file to the associated source control project.
•Remove
Remove the current file from source control.
Does not automatically delete any local copies of the file.
•History
Show the current file's history.
•Compare
Compare the current file to a previous version.
•Connect Folder
Connect a local folder to source control.
 This makes it easier to work with groups of files since they can be more easily checked in and out as a unit, and since they'll be conveniently located in a single local folder on your computer when you're working with them.
•Refresh
Refresh source control status.
•Properties
Show source control properties.
See also: